
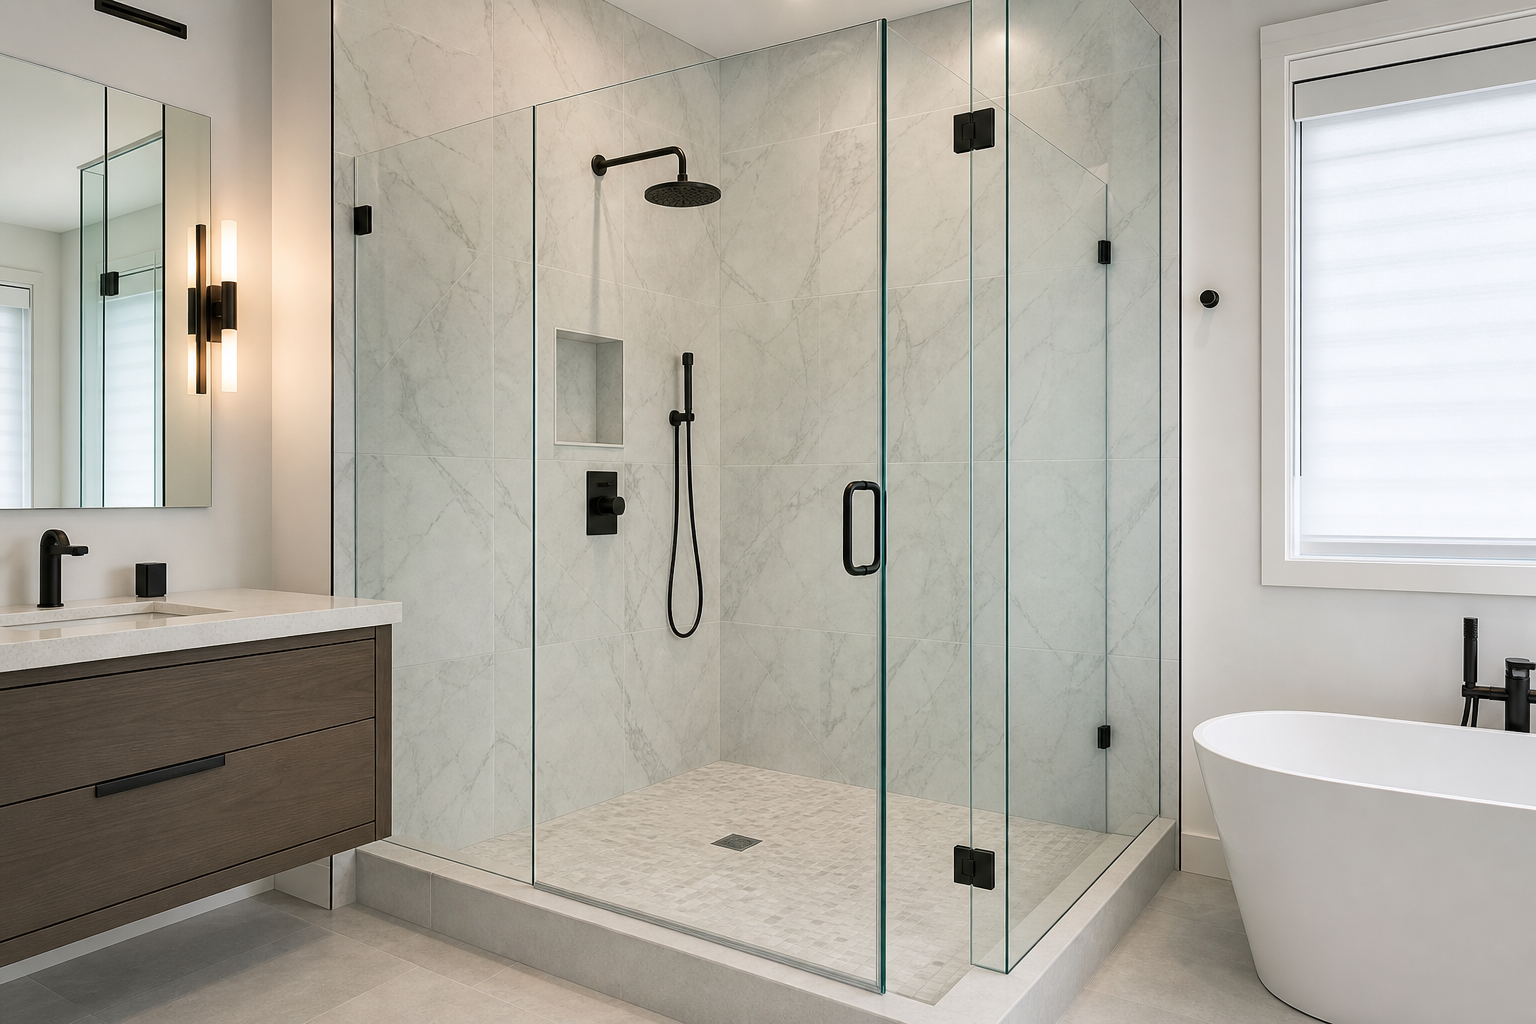
A Practical Guide to Shower Door Installation Edmonton
Planning a shower door installation in Edmonton starts with clear goals: selecting the right door style, measuring accurately, preparing the space, and deciding whether to install it yourself or hire a professional. This practical guide walks through the essential decisions, common pitfalls to avoid, and maintenance basics so your new door looks great and works smoothly for years.
Choosing the right shower door
The best shower door is the one that fits your layout, daily routine, and design vision. Use this short-list to focus your choices:
- Frameless shower doors: Popular for a clean, minimal look that showcases tile and stone. They typically use sturdy glass and rely on precise hardware placement for alignment.
- Sliding shower doors: Ideal where floor space is tight because panels move within the track rather than swinging out. Look for smooth, reliable rollers and solid guide systems.
- Swing (pivot) shower doors: Provide a wide opening and straightforward access. Make sure there’s enough clearance for the door to swing without hitting vanities or toilets.
- Neo-angle shower doors: Designed for corner showers with angled thresholds. Accurate angle measurements are crucial for a tight, drip-resistant fit.
- Tub doors: A functional, polished alternative to curtains on alcove tubs. Consider sliding tub doors when space is limited.
Hardware finish helps unify your bathroom design. Common, versatile options include Chrome, Matte Black, Brushed Nickel, and Gold. Match the finish to existing fixtures for a cohesive result.
Measuring and prep checklist
Accurate measurements and a well-prepared opening make installation smoother and reduce the risk of leaks or binding doors. Use this checklist before you order:
- Confirm wall plumb and floor level: Use a spirit level on both verticals and across the threshold. Note any out-of-plumb or out-of-level conditions; these affect hardware selection, glass sizing, and seal placement.
- Measure opening width(s): Measure the top, middle, and bottom. Record the smallest width to guide sizing and identify any taper.
- Measure opening height: Measure from the top of the curb or tub deck to the desired height. Verify ceiling height if you’re planning taller panels.
- Check corner angles (for neo-angle or custom layouts): Don’t assume 90 degrees. Measure the actual angles to ensure the door and side panels align.
- Identify obstructions: Confirm clear swing or slide paths. Account for toilets, vanities, towel bars, and baseboards.
- Verify substrate readiness: Tile, stone, or solid-surface walls should be fully installed, grouted, and cured. The curb should be pitched slightly inward toward the drain to help keep water in the shower.
- Locate studs or blocking: For hinging points or tracks that will carry load, identify studs or solid backing to secure fasteners (especially important with pivot/swing doors).
- Ventilation plan: Ensure adequate bathroom ventilation to reduce condensation on glass and hardware over time.
Tip: Photograph and label your measurements. Double-check everything before placing an order—especially for custom or angled enclosures.
Installation pathways: DIY vs. pro
Many homeowners consider a do-it-yourself approach for straightforward openings, while others prefer professional installation for precision and peace of mind. Weigh the following factors:
- Complexity: Corner units, neo-angle layouts, heavy frameless panels, and doors in out-of-plumb conditions generally require advanced skills and specialized tools.
- Tools and handling: Glass panels are heavy and fragile at edges. Safe handling often needs two people, suction cups, stable support blocks, and protective gear.
- Water management: Correct threshold pitch, sweep and seal selection, and accurate silicone application are critical to prevent leaks.
- Adjustability: Hinges, rollers, and strikes must be aligned so the door closes smoothly, with even reveals and consistent gasket contact.
- Timeline: Even simple installs take time for careful layout, drilling, setting hardware, sealing, and cure time for silicone.
If you proceed DIY, read all manufacturer instructions thoroughly and stage the workspace so tools, shims, fasteners, and seals are within easy reach. If you prefer a professional path, request a written scope that covers measurement, fabrication lead time (if custom), installation steps, cleanup, and post-install support.
Hardware and sealants basics
Reliable hardware and thoughtful sealing make the difference between a door that “just works” and one that requires constant fiddling. Focus on these elements:
- Hinges and pivots (for swing doors): Choose models appropriate for your glass size and weight. Confirm the opening direction and maximum swing to clear nearby fixtures.
- Rollers and guides (for sliding doors): Smooth, durable shower rollers and secure guides keep panels aligned. Check that adjusters can fine-tune height and plumb.
- Handles and towel bars: Pre-plan their height for all household users and align with other fixtures in finish and style.
- U-channels vs. clamps (frameless and fixed panels): U-channels help accommodate slight out-of-plumb conditions; clamps offer a minimal look but demand precise walls.
- Seals, sweeps, and thresholds: Bottom sweeps, magnetic or vinyl side seals, and threshold trims help direct water back into the enclosure. Keep seals cut square and fully seated.
- Silicone sealant: Use bathroom-grade, mold-resistant silicone. Apply a continuous bead at inside seams where specified, tool it neatly, and follow cure times before first use.
Step-by-step install overview
Specific steps vary by door model, but the general workflow below can help you plan and cross-check:
- Layout and marking: Dry-fit hardware locations. Use a level and tape to mark hinge, track, or clamp positions. Confirm clearances for swings or slides.
- Drilling and anchors: For tiled walls, use the correct bit and speed. Tape over marks to reduce wandering, and avoid grout lines when possible. Set anchors suited for your substrate.
- Install fixed hardware: Mount U-channels, tracks, or hinge plates first. Re-check plumb and level after tightening. Shim where necessary to maintain reveals.
- Set fixed glass panels: Place protective shims on the curb. Ease the panel into channels or clamps and confirm alignment. Tighten hardware to manufacturer torque guidance.
- Hang moving panels: Mount the door on hinges or hang sliders on rollers. Adjust for even gaps and smooth travel. Confirm latch or magnetic alignment.
- Install seals and sweeps: Measure twice, cut once. Test the door through full motion to confirm contact without binding.
- Silicone and finishing: Apply sealant to specified seams. Tool neatly and remove excess. Clean glass and hardware, install caps or cover plates, and remove protective films.
- Cure and test: Allow recommended cure time. Then spray-test seams, run the shower, and check for drips or weeps. Address any issues before regular use.
Waterproofing and maintenance
A watertight install protects adjacent finishes and keeps daily cleanup simple. Build in these habits and details:
- Threshold slope: Ensure the curb or tub deck pitches slightly toward the drain so stray water returns to the enclosure.
- Continuous seals: Avoid gaps at corners and transitions. Replace worn sweeps or gaskets promptly to maintain performance.
- Daily wipe-down: A quick squeegee or microfiber wipe after showers helps reduce spots and soap film.
- Routine cleaning: Use non-abrasive cleaners suitable for glass and metal. Rinse thoroughly and dry to protect finishes like Chrome, Matte Black, Brushed Nickel, and Gold.
- Hardware check: Periodically confirm hinge screws, clamp fasteners, and roller adjustments are snug. Address creaks or drag immediately.
Space planning tips
Door choice and orientation affect how the whole bathroom functions. Keep usability front-and-center:
- Clearances: For swing doors, verify the door won’t strike nearby fixtures and that you can step in safely.
- Traffic flow: Position handles and openings where entry and drying are intuitive.
- Small baths: Sliding doors and neo-angle layouts can preserve usable floor area.
- Storage: Ensure towel bars or hooks are reachable from outside the wet zone.
- Lighting: Transparent enclosures help share light across the room; plan task lighting for mirrors and vanities accordingly.
Budget and scope considerations
Every project is unique, and total investment depends on several variables. Use the factors below to shape your scope and compare options:
- Door type and configuration: Frameless, sliding, swing, neo-angle, and tub doors have different hardware and glass needs.
- Custom sizing and angles: Non-standard widths, tall panels, and angled corners typically require custom fabrication.
- Hardware selection: Finish choices (Chrome, Matte Black, Brushed Nickel, Gold) and premium components influence cost.
- Site conditions: Out-of-plumb walls or uneven curbs may require additional materials and time.
- Glass options and add-ons: Fixed panels, transoms, and special configurations affect pricing and timeline.
- Installation method: DIY reduces labor cost but increases personal time and responsibility; professional installation consolidates measurement, fitment, and finishing.
To make fair comparisons, request written scopes that outline measurement responsibilities, fabrication details, hardware specs, sealing approach, cleanup, and follow-up.
Timeline and coordination
Shower door projects typically progress through clear phases. Coordinate with any ongoing renovation to avoid rework:
- Design and selection: Choose door type, hardware finish, and layout that fits your space and routine.
- Measurement: Measure after tile and curb are complete to capture final dimensions. Verify angles for corner and neo-angle units.
- Fabrication and procurement: Custom glass and specialty hardware are prepared to spec.
- Installation: Hardware is mounted, panels are set and aligned, seals are applied, and silicone is tooled.
- Cure and quality check: Allow sealant to cure fully, then test for leaks and smooth operation.
- Maintenance handoff: Keep care instructions and replacement sweep part numbers on file.
Common pitfalls and how to avoid them
- Ordering before tile is complete: Early measurements can be off by enough to cause leaks or binding. Measure finished conditions.
- Ignoring wall and curb variance: Even small deviations impact fit. Use shims or channels where appropriate and account for reveals.
- Under-sizing sealing: Gaps at corners or thresholds lead to drips. Choose seals and sweeps that match your door profile.
- Over-tightening hardware: Excess torque can stress glass and deform gaskets. Follow manufacturer guidance.
- Skipping cure time: Using the shower before silicone cures can compromise seals. Wait the recommended interval.
FAQs
Which shower door style works best for small bathrooms?
Sliding doors conserve floor space because panels move within the track rather than swinging into the room. Neo-angle doors can also help in corners by trimming footprint while preserving access. If you prefer a swing door, confirm it clears nearby fixtures and traffic paths.
How do I know if my walls are plumb and my curb is level?
Use a reliable spirit level. Check both vertical sides of the opening from top to bottom and the curb from end to end. Note any variance and share it with your installer or factor it into hardware choices such as U-channels that can accommodate slight deviations.
What hardware finishes are easiest to coordinate with existing fixtures?
Chrome, Matte Black, Brushed Nickel, and Gold are common, versatile choices that typically have matching or complementary faucet and accessory options. Select one finish and carry it through handles, bars, and hinges for a cohesive look.
Do I need special maintenance for a frameless door?
All doors benefit from daily wipe-downs and non-abrasive cleaners. Frameless doors rely on precise alignment and seals, so periodically inspect sweeps and hinges, keep fasteners snug, and replace worn gaskets to maintain smooth operation and water control.
When should I choose professional installation over DIY?
Consider a professional when dealing with heavy frameless panels, neo-angle layouts, out-of-plumb conditions, or when you lack the tools and helpers for safe handling and precise drilling. Professional measurement and fitment can reduce rework and help ensure a clean, watertight result.


