
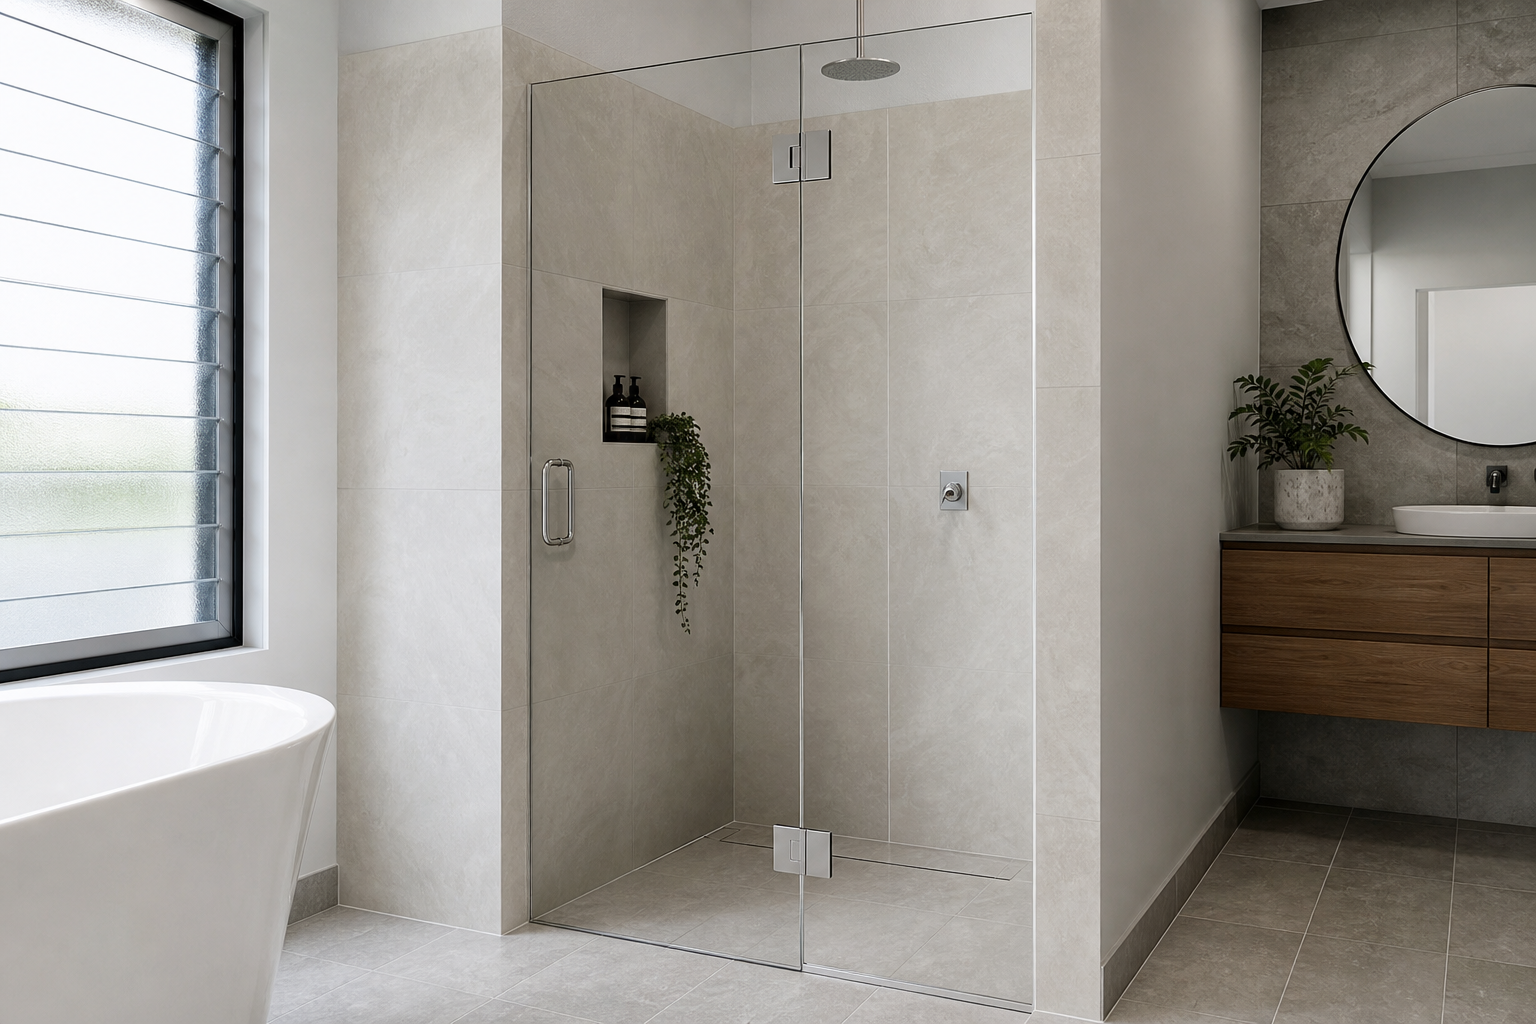
Pivot shower doors: how to choose, measure, and maintain
Pivot shower doors are a timeless, space-savvy way to enter a shower: the panel rotates on a set of pivots mounted at the top and bottom, rather than swinging solely on side hinges. Whether you’re upgrading from a curtain or replacing a tired enclosure, understanding how pivot systems work, where they shine, and how to plan measurements will help you choose a door that looks great and functions flawlessly for years.
What they are and how they work
A pivot door rotates on an axis created by two mounting points (pivots) aligned vertically. Those pivots can be placed at the very edge of the glass (traditional swing) or set inwards from the edge (true pivot), which slightly reduces the arc sweep into the room and can improve balance on wider panels. Because the load transfers through the floor and header (or ceiling fixing) instead of a side wall alone, pivot systems distribute weight efficiently and allow for clean, minimal hardware.
- Top and bottom pivots: The pivot pins seat into matching receivers. The bottom pivot bears most of the weight; the top keeps the panel aligned.
- Threshold vs. curbless: Doors can mount on a low curb/threshold or on a level, curbless pan; both require proper water containment planning.
- In-swing, out-swing, or dual-action: Some pivot kits allow limited in-swing for cleaning or tight spaces; always verify drainage and code requirements for safe egress in your area.
Pivots are common in frameless glass designs, but they also work in semi-frameless and framed enclosures. The mechanism is simple, robust, and serviceable, making it a favorite for both minimalist and classic bathrooms.
Benefits and tradeoffs
Like any door style, pivot shower doors offer distinct advantages along with a few considerations. Weigh these points against your space and priorities.
- Clean look with minimal hardware: With weight carried at the floor and header, you can keep wall profiles slim.
- Reliable movement: The pivot action is smooth and tolerant of minor wall irregularities compared to some side-hinged setups.
- Flexible placement: Setting the pivot a few inches in from the edge can shrink the door’s swing arc into the bath area.
- Good for larger glass panels: Pivots manage weight well, supporting wider or taller doors when engineered correctly.
Potential tradeoffs to plan around:
- Swing clearance required: You’ll still need room for the door to open without striking vanities, toilets, or towel bars.
- Water management: Because the door opens, pay attention to sweep gaskets, thresholds, and shower-head placement to minimize splash-out.
- Floor contact point: The bottom pivot bears load; it must mount on a sound, level surface with proper sealing.
Measuring and clearances checklist
Accurate measurements and realistic swing planning are the difference between a door that feels custom-fitted and one that’s fussy. Use this checklist before you order.
- Verify wall plumb and opening width.
- Measure width at the base, middle, and top of the opening. Note the smallest number.
- Check each wall with a level. Minor out-of-plumb can be accommodated with certain hardware; large deviations may require shimming or different configurations.
- Confirm height to the lowest obstruction.
- Measure from the finished curb or floor to any overhangs, lights, or sloped ceilings that could interfere with the top pivot or door height.
- Plan the swing arc.
- Mark the pivot point location (edge or inset). Sketch the arc to ensure the door clears nearby fixtures and walls.
- If using an inset pivot, remember the arc is reduced but not eliminated.
- Check threshold slope and containment.
- Ensure the curb or floor pitches slightly toward the drain inside the shower to help keep water in.
- Plan for bottom sweeps and side seals where needed, especially on curbless entries.
- Confirm hinge side substrate.
- Although pivots don’t hang from a side stud the way a hinged door does, side jambs and adjacent glass still benefit from solid, plumb surfaces and strong anchoring points for fixed panels or seals.
- Account for mats and rugs.
- Bathroom rugs can interfere with the door’s sweep or catch water; place them outside the arc or choose low-profile options.
- Note special features.
- If you want towel bars, handles, or knobs, confirm their placement won’t hit walls or enclosures during the swing.
When in doubt, template the swing with painter’s tape on the floor and a cardboard mock-up of the panel width. It’s a quick way to visualize clearances around toilets, vanities, and doors.
Configuration and design choices
Pivot shower doors adapt to many layouts. Consider these common configurations and finishes as you dial in the look and function you want.
- Single pivot door in a straight opening: The most common setup for alcove showers. Add a fixed glass sidelite if the opening is wider than a comfortable door width.
- Neo-angle pivot on corner showers: A pivot door on the angled face offers a centered entry that feels spacious even in compact footprints.
- Curbless or low-threshold entries: Combine with minimal bottom seals and a properly sloped pan for barrier-reduced access.
- Inline panel with return: For larger spaces, an inline fixed panel next to the door with a 90-degree return panel can wrap around a bench or niche while keeping the door’s swing free.
Design details to finalize:
- Glass thickness and edge style: Thicker glass provides a solid feel; polished or beveled edges refine the finish.
- Privacy and coatings: Choose clear, low-iron, patterned, or frosted glass to control privacy and color cast. Optional protective coatings can help reduce spotting and simplify cleaning.
- Hardware aesthetics: Select handle styles and hardware finishes that coordinate with faucets and lighting for a cohesive room design.
- Door sweep and seals: Clear vinyl sweeps at the bottom and magnetic or brush seals at the strike side reduce splash and drafts without compromising appearance.
Installation considerations
Good planning sets up a smooth installation day. Here are the practical points that make the difference.
- Surface preparation: Tile or solid-surface walls should be fully set and grouted; shower pans and curbs should be finished, level, and clean.
- Anchoring and sealing: The bottom pivot needs a secure anchor and careful sealing to prevent water ingress. Use manufacturer-recommended fasteners and sealants appropriate for wet areas.
- Alignment and reveal: Consistent gaps between panels and walls (the “reveal”) ensure seals contact evenly and the door swings without rubbing.
- Swing stop and return: Many pivot systems include adjustable stops so the door rests closed with just enough magnetic engagement on the strike.
- Drain and spray direction: Position the shower head so it doesn’t directly spray the door’s strike side. This reduces reliance on seals for water management.
- Final inspection: Cycle the door multiple times to verify smooth action, magnetic latch alignment, and that the bottom sweep just kisses the threshold without dragging.
If your project includes custom glass cuts or multi-panel assemblies, precise site measurements and detailed shop drawings help ensure the glass arrives ready to fit.
Care and maintenance
Pivot systems are straightforward to keep in top shape. A few routine habits will preserve clarity and motion.
- Daily or after-use wipe-down: A quick pass with a squeegee or microfiber towel limits mineral buildup on glass and hardware.
- Gentle cleaners: Use non-abrasive, non-ammonia cleaners designed for glass and metal. Avoid pads that could scratch glass or finishes.
- Seal upkeep: Inspect bottom sweeps and side seals periodically; replace if they harden, tear, or lose contact.
- Hardware check: Tighten visible set screws as needed. If the door begins to sag or rub, a small pivot adjustment often restores alignment.
- Drainage vigilance: Keep the threshold channel and corners free of soap residue so water flows back into the pan.
With consistent, light maintenance, the door will continue to close cleanly and the glass will stay bright.
Troubleshooting and repair
Most issues with pivot shower doors are minor and fixable with simple adjustments or hardware refreshes.
- Door won’t stay closed: Check magnetic strike alignment and adjust the pivot or strike plate. Make sure seals aren’t bunching.
- Dragging at the bottom: Confirm the threshold is clean and the sweep isn’t trimmed too long. Adjust the bottom pivot height if the system allows.
- Water escaping near the hinge side: Add or replace a vertical seal at the pivot side and verify the shower head isn’t pointing directly at the gap.
- Squeaks or stiffness: Clean and dry the pivot area; verify fasteners are snug. Avoid oil-based lubricants that attract dust—use products approved for wet-area hardware if lubrication is recommended by the manufacturer.
- Glass spotting or haze: Use a dedicated glass cleaner and a non-scratch pad. Persistent white spots are often mineral deposits; consistent squeegeeing after showers helps prevent them.
For cracked glass or severely misaligned doors, pause use and consult a qualified installer to assess safety and replacement options.
Decision checklist
Before you finalize your selection, walk through this quick checklist to confirm a pivot door is the right fit for your bath.
- Space: The planned swing arc clears toilets, vanities, and towel bars.
- Containment: Threshold slope and seal plan will control splash effectively.
- Structure: The floor and header can accept the pivot anchors and any needed bracing for fixed panels.
- Use patterns: Primary users can comfortably operate the door; handle height and grip style suit all household members.
- Design coherence: Hardware finish matches nearby fixtures; glass style supports your lighting and tile choices.
- Serviceability: Replacement seals and hardware components are identifiable for future upkeep.
FAQ
What’s the difference between pivot shower doors and hinged doors?
Both are “swinging” doors, but a hinged door hangs from side-mounted hinges on the wall or an adjacent glass panel, while a pivot door rotates on top and bottom pins. Pivots shift the load to the floor and header, can reduce the door’s swing arc if set in from the edge, and often require less visible side hardware.
Do pivot doors work in small bathrooms?
They can—provided you plan the swing carefully. Using an inset pivot to shorten the arc, choosing an appropriate door width, and confirming clearance around nearby fixtures are the keys. If swing space is extremely limited, consider a sliding door instead.
How do I keep water from leaking out?
Combine several measures: slope the threshold slightly toward the drain, position the shower head to avoid spraying the strike side directly, and use bottom sweeps plus vertical seals at the strike and (if needed) the pivot side. Ensure the door closes squarely so seals make even contact.
Can pivot doors be used with curbless showers?
Yes, many are installed on curbless pans. Just pay closer attention to the floor slope toward the drain, the placement of seals, and the swing direction so water stays within the wet zone.
What glass thickness should I choose?
Thicker glass delivers a more substantial feel and can look more seamless in frameless designs. The best choice depends on your opening size, hardware system, and aesthetic goals. If you’re unsure, discuss the options with your installer to balance weight, rigidity, and budget.


