
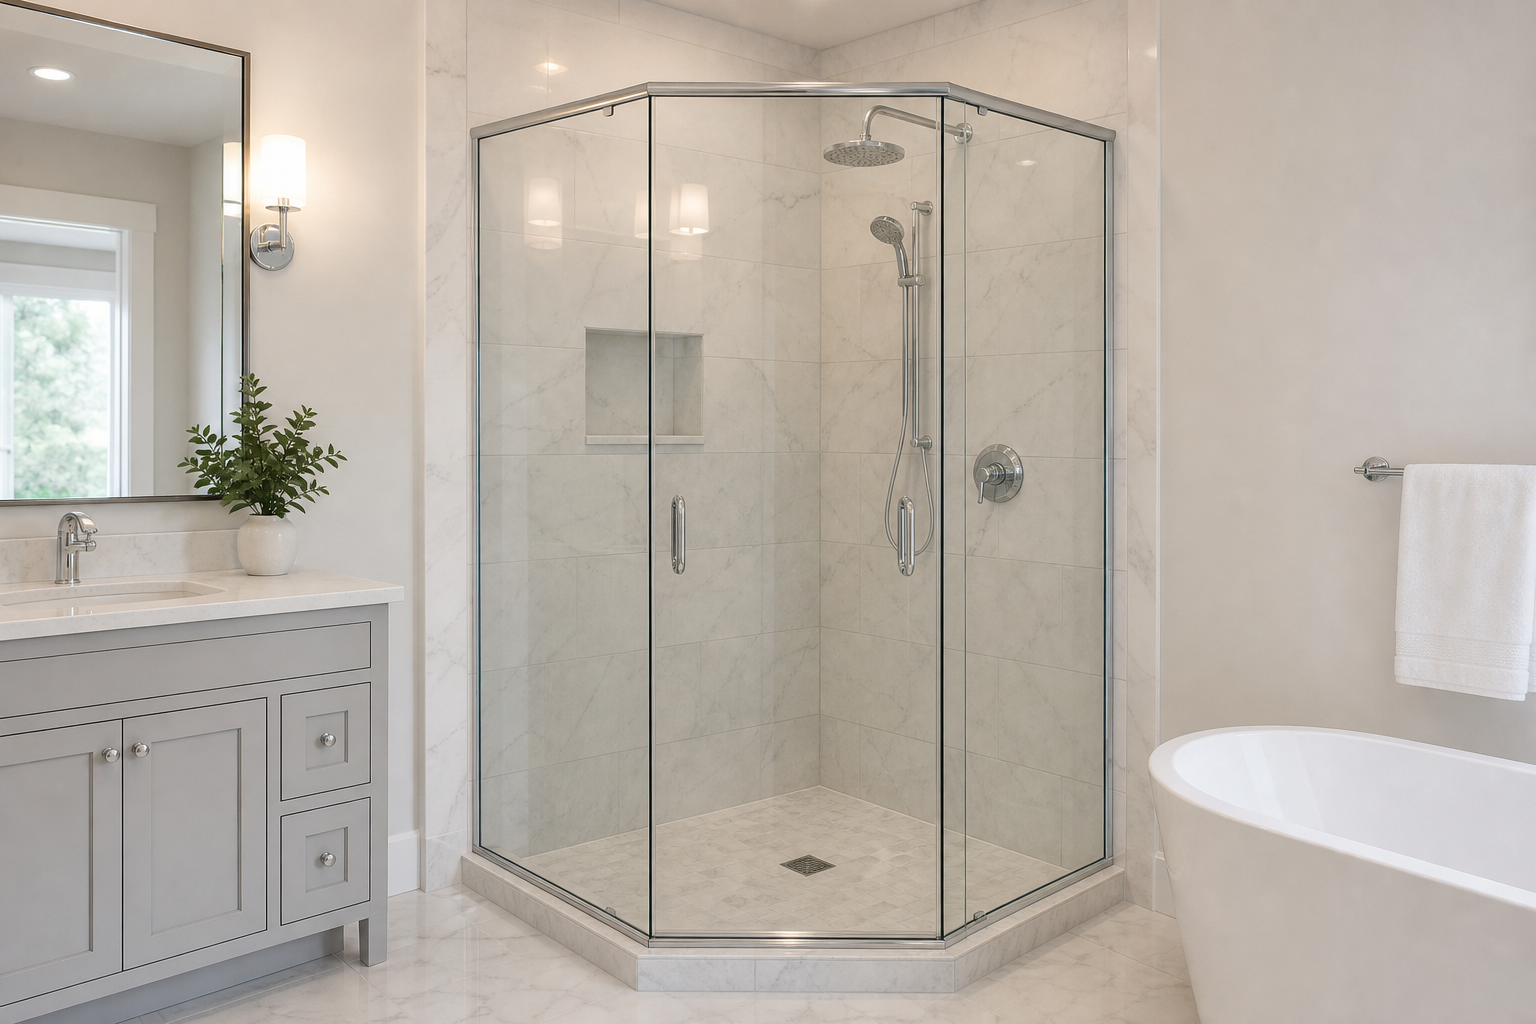
neo angle shower doors: layout choices, measurements, and maintenance checklist
Neo angle shower doors create a faceted, space-efficient entrance for corner showers. By cutting across the corner with a straight door and two adjacent angled panels, they open floor area, improve traffic flow, and give bathrooms a clean, geometric look. This guide walks through how neo angle layouts work, how to measure for them, what to consider for glass and hardware, ways to limit leaks, and how to keep everything looking clear and operating smoothly over time.
How neo angle enclosures work
A neo angle enclosure is designed for a 90-degree bathroom corner. Instead of enclosing the corner with a simple square, two short side returns meet two angled glass panels that create a front face for a hinged or pivoting door. The result is a pentagon-like footprint that:
- Shifts the door opening away from toilets or vanities to ease clearance.
- Softens the visual bulk of a square corner with elegant facets.
- Maximizes usable floor area in smaller rooms by trimming the corner.
Common variants include fully frameless systems with minimal metal, semi-frameless units with slim perimeter channels, and framed kits with visible profiles around each edge. The right choice depends on your aesthetic targets, tolerance for visible hardware, and installation conditions.
Layout choices and door swing
Selecting a layout upfront helps avoid clearance conflicts and ensures the door works with your room. Use the following checkpoints to narrow options:
- Door handing and swing: Determine whether the door should hinge on the left or right, and whether it will swing out only or both directions (if hardware allows). Check for obstacles like towel bars, toilets, and drawers.
- Footprint size: Measure from each wall to the intended corner cut. Larger faces improve elbow room and splash control, while smaller faces preserve more bathroom floor space.
- Curb vs. curbless: A low curb contains water and simplifies door alignment. Curbless entries reduce trip hazards and emphasize a clean line at the floor but require especially careful slope control.
- Header vs. open-top: Some installations use a stabilizing header across the angled face. Fully open tops enhance the airy look but rely on thicker glass and well-positioned support brackets.
Because neo angle shower doors intersect at non-90-degree joints, stability and alignment are especially important. Plan for at least one fixed panel to brace the door side and reduce flex.
Measurement basics for neo angles
Accurate measurement is the foundation of a watertight, rattle-free installation. A concise, repeatable approach helps you capture key dimensions:
- Verify wall plumb: Check both corner walls for plumb with a level. Note any out-of-plumb conditions separately for the bottom, midpoint, and top. Small deviations can be accommodated with channels or custom glass adjustments.
- Record curb conditions: Measure the curb width and confirm it is level along the full run where glass will sit. If curbless, mark finished tile extents and the slope direction/degree inside the shower.
- Locate the door centerline: Decide where the door will land on the angled face. Keep the swing clear of fixtures and allow enough room for hinges and handle hardware.
- Capture opening sizes at multiple heights: For each panel run (the short returns and the angled faces), measure at the curb, mid-height, and near the top. Note the largest and smallest values; this reveals taper or bow.
- Confirm angles: The front facets typically meet at standard angles, but field conditions can vary. Where possible, verify the actual corner cut using an angle finder or a precise template method.
- Account for tile edges and reveals: Include grout joints and trim caps in your final numbers so glass edges finish cleanly without overhang or unexpected gaps.
When in doubt, create a cardboard or wood template for the angled face, especially for curbless floors with compound slopes. A template transfers complex geometry to fabrication with fewer surprises.
Glass thickness and clarity
Choosing glass involves a balance of rigidity, weight, and visual goals:
- Thickness: Thicker glass increases rigidity and reduces door flex, which is particularly helpful on open-top, frameless neo angles. Thinner glass may be appropriate with stabilizing channels or headers.
- Edge finishing: Polished edges complement frameless looks and reduce visual weight at the seams.
- Clarity: Standard clear glass has a subtle green hue at the edge; low-iron glass presents a more neutral edge and can enhance bright, minimal bathrooms.
- Privacy options: Patterned or frosted panels break sightlines without fully blocking light, useful where the shower sits near shared space.
Regardless of style, properly tempered safety glass is the standard for shower enclosures.
Hardware finishes and function
Neo angle shower doors rely on robust hardware to maintain alignment across angled joints. Focus on:
- Hinges and pivots: Heavier doors benefit from larger hinges or pivot systems that transfer load to the curb. Check manufacturer requirements for glass thickness and hinge count.
- Handles and pulls: Centered vertical pulls are common on the angled door face; choose shapes that echo other bathroom fixtures.
- Clamps and brackets: Minimal, surface-mounted clamps maintain the frameless look while stabilizing fixed panels at the angles.
- Channels: Slim channels neatly capture glass on returns, helpful for walls with minor out-of-plumb variation and for improving water control.
- Seals and sweeps: Clear vinyl seals at the door edges and a bottom sweep along the curb (or threshold) help keep water inside while preserving a clean look.
Coordinate finishes across hinges, clamps, handles, and any headers so the geometry feels intentional rather than pieced together.
Waterproofing and splash control
Good waterproofing comes from the structure beneath the glass just as much as from the glass assembly itself. Keep these principles front and center:
- Continuous slope: Pitch the shower floor toward the drain, including under door and panel lines. Flat spots near the angled door face are common leak points.
- Threshold design: A slightly raised curb or a subtle saddle-shaped threshold can deflect splash back into the pan. For curbless, increase diligence with slope and consider a linear drain near the opening.
- Strategic door stop: Position the door to close against a stop or magnetic seal so the latch line remains tight.
- Targeted sealants: Use appropriate, mold-resistant sealant at channels and along base interfaces, leaving designed weep paths open where required.
On small, high-pressure showers, a slightly larger angled face and a door that closes toward the shower spray can noticeably reduce escape splashes.
Ventilation and steam
Because neo angle enclosures present a reduced opening area compared with straight alcove doors, humidity management matters:
- Ensure your exhaust fan moves moist air quickly; locate its intake where steam naturally collects.
- Leave the door ajar after use to accelerate dry-out time.
- Consider a transom or taller fixed panels only if your ceiling height and ventilation can support slower moisture dissipation.
Consistent airflow helps protect finishes, grout lines, and hardware over the long term.
Maintenance and care checklist
Neo angle shower doors stay clear and rattle-free with simple routine care. Use this checklist to extend service life and maintain clarity:
- After each shower: Squeegee glass from top to bottom, including angled seams. Wipe hardware dry to limit mineral spots.
- Weekly: Clean glass with a non-abrasive, ammonia-free cleaner and a soft microfiber cloth. Rinse seals and sweeps to remove soap film.
- Monthly: Inspect hinge set screws and handle hardware for snugness; check sweeps and vertical seals for wear. Confirm the door closes evenly against stops or magnets.
- Quarterly: Clear any channel weep holes, refresh silicone joints that show separation, and check the curb or threshold for standing water.
- As needed: Replace worn bottom sweeps and edge seals to maintain splash control and a quiet close.
Avoid abrasive pads and harsh chemicals that can scratch glass or dull metal finishes. For patterned or frosted panels, use cleaners approved for decorative surfaces.
Common planning mistakes to avoid
- Forgetting door clearance: Not verifying the path of the swing against toilets, towel bars, or shelves can force a last-minute hinge flip that doesn’t suit the space.
- Ignoring floor slope at the opening: An almost-level threshold at the angled door face invites leaks. Even small slope corrections make a difference.
- Under-specifying glass support: Large doors without a stabilizing fixed panel or header can flex, leading to misalignment and premature seal wear.
- Uncoordinated hardware finishes: Mixed metals distract from the geometry. Decide on a single finish family early.
- Measuring once: Single-point measurements miss bow and taper in walls and curbs. Always measure at multiple heights and positions.
When neo angle makes the most sense
Neo angle shower doors are particularly effective when:
- You are finishing a corner shower and want to shift the opening away from nearby fixtures.
- You prefer a lighter, more faceted visual compared with a square corner enclosure.
- Floor area is tight and you want to reclaim space by trimming the corner.
- Your design emphasizes minimal hardware and clean, geometric lines.
For long, straight alcoves, sliding or hinged inline doors may be more straightforward. For unusually shaped corners or uneven substrates, custom fabrication and careful templating become especially valuable.
Installation sequence overview
Every product line differs, but most neo angle installs follow a similar high-level sequence:
- Layout and marking: Dry-fit or mark channel positions on the curb and walls, confirming the door centerline and swing.
- Base preparation: Verify level and slope, then secure channels or set clamps in exact positions. Seal where specified.
- Fixed panel setting: Install return panels and the non-hinged angled panel first to establish a rigid frame.
- Hardware mounting: Attach hinges or pivots to the fixed panel or wall, aligning to the pre-marked door centerline.
- Door hanging and adjustment: Set the door, adjust reveals for even gaps, and ensure smooth swing and latch contact.
- Sealing and finishing: Install vinyl seals, bottom sweeps, and apply silicone where required. Clean residue and verify weep paths.
- Final checks: Operate the door repeatedly, inspect for rub or rattle, and confirm closure against the stop or magnet along the full height.
Taking time to fine-tune reveals on an angled door pays dividends in quiet operation and consistent gasket contact.
Style tips for a cohesive look
- Echo angles elsewhere: Repeat the enclosure angle in mirror shapes, light fixtures, or tile patterns for a subtle, unified theme.
- Align grout and hardware: Center handles or hinges to correspond with tile grout lines for a crisp, intentional layout.
- Balance transparency and privacy: Use clear glass for an open feel; choose frosted or patterned panels where privacy is a priority.
- Coordinate metals: Match hinge and handle finishes to faucets and accessories so the enclosure feels integrated, not isolated.
FAQ: neo angle shower doors
What measurements matter most for a neo angle enclosure?
The critical dimensions are the lengths of each return and angled face at multiple heights, the door centerline, wall plumb readings, and curb or threshold level. Capturing the smallest and largest readings at each run helps account for walls that taper or bow.
Do neo angle doors leak more than straight enclosures?
They do not have to. Solid waterproofing under the tile, a threshold that manages splash, correct door alignment, and intact seals and sweeps are the main defenses. Many leaks trace back to insufficient floor slope right at the opening or to worn bottom sweeps.
Can a neo angle work without a curb?
Yes, curbless neo angles are possible, but they demand careful slope design and diligent seal placement. A well-positioned linear drain and a slightly deeper shower footprint can help contain splash.
Which glass thickness should I choose?
Thicker glass improves rigidity, which is useful for frameless, open-top layouts. If your design uses channels or a stabilizing header, slightly thinner glass may be suitable. Always coordinate thickness with hinge or pivot hardware requirements.
Is the door swing reversible?
Many systems allow left- or right-hand installation, but plan the handing before fabrication to ensure the handle position, hinge holes, and any notch details align with the intended layout.


