
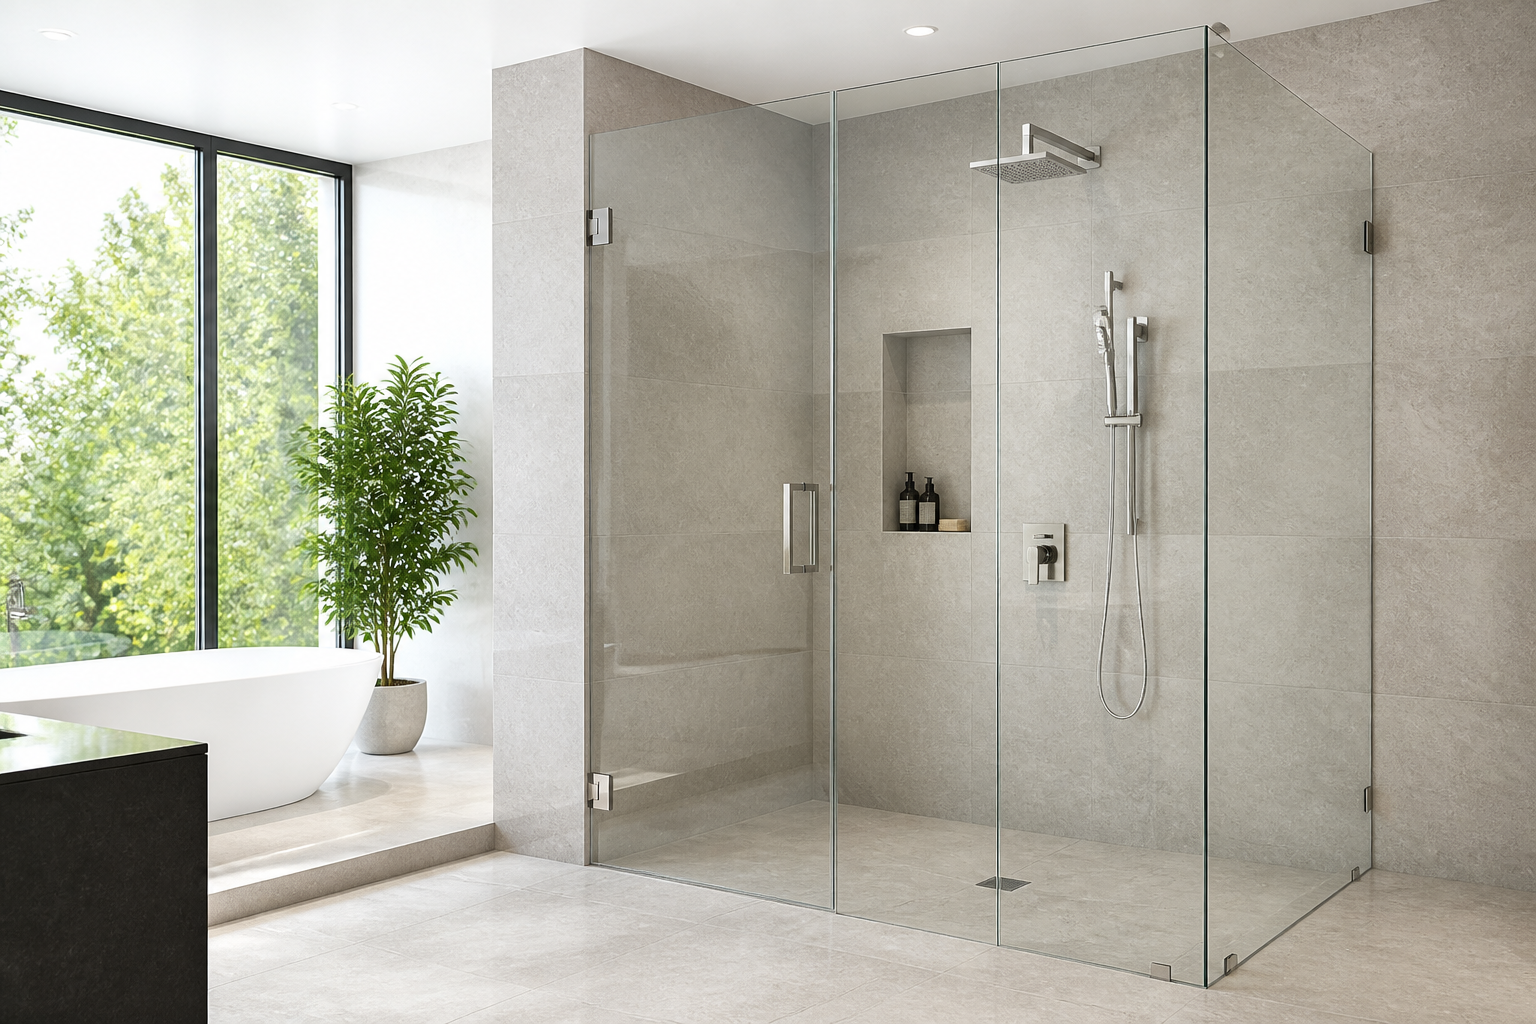
A Practical Guide to Frameless Shower Doors
Frameless shower doors create a clean, open look by using thick, tempered glass with minimal metal. If you are weighing this option for a bathroom update, this guide walks through essential concepts—from glass and hardware choices to water management, maintenance, and a step-by-step planning checklist—so you can make clear, confident decisions.
What are frameless shower doors?
Frameless shower doors are glass panels mounted without the full metal frame used on traditional enclosures. Instead, the glass is anchored with discrete hardware such as wall hinges, U-channels, or clamps. The result is a streamlined appearance that showcases tile and stonework while maximizing visual space.
- Glass: Typically thick, tempered sheets designed for shower use.
- Edges: Polished edges enhance the seamless aesthetic.
- Hardware: Minimal and functional—hinges, clips, handles, and support bars as needed.
- Seals: Clear vinyl sweeps and strike seals help reduce splashes at door gaps.
“Frameless” does not mean the absence of all metal. You will still see hinges, handles, and sometimes low-profile channels or headers that secure the glass safely.
Pros and cons
Every shower enclosure choice involves trade-offs. Use this quick comparison to match frameless doors to your goals.
Advantages
- Open, modern look with uninterrupted sightlines.
- Easier visual access to tile, stone, or niche details.
- No full metal frame, which means fewer visual breaks and fewer crevices to trap grime.
- Customizable configurations for unique spaces and layouts.
Considerations
- Heavier glass requires accurate measurement and proper anchoring.
- Door gaps are part of the design; seals reduce but do not eliminate splashes.
- Walls, floors, and curb must be square and plumb for best fit and function.
- Hardware placement and swing direction need upfront planning.
Measurement and glass thickness
Accurate measurement is the foundation of a successful frameless installation. Even small out-of-square conditions affect how panels align and how door sweeps perform. Before ordering, capture these details:
- Opening width and height at multiple points (top, middle, bottom; left and right).
- Out-of-plumb or out-of-level conditions for each wall and the curb.
- Location of studs or solid blocking for hinge and clamp attachment.
- Clearances for doors to swing without contacting fixtures or vanities.
- Curb pitch to direct water back toward the drain.
Frameless systems rely on thicker tempered glass than framed units. Thicker glass improves rigidity and the clean, minimal look. Pair the thickness with appropriate hardware rated for the panel size and weight, especially on pivot or swinging doors.
Hardware and configuration options
Hardware and layout decisions influence both appearance and daily usability. Consider the following categories when shaping your design:
Door type
- Hinged (swing): A pivoting door secured to a wall or adjacent panel. Choose an inward, outward, or dual-swing hinge based on space and splash control.
- Sliding: One or more panels glide on rollers or guides. Useful for tight bathrooms where door swing would interfere with fixtures.
- Fixed-panel walk-in: A stationary panel with an open entry. Minimal hardware and easy access, best with well-positioned shower heads.
Support strategy
- Wall hinges and clamps: Attach to solid backing; align carefully to support weight.
- U-channels: Low-profile tracks at the base or wall edges that provide additional stability.
- Headers or support bars: Used when stability is needed across wider spans or for fixed panels.
Handles and pulls
- Straight pulls for a modern line, ladder pulls for a bold statement, or minimal knobs for compact spaces.
- Coordinate the finish with other bathroom fixtures for a cohesive look.
Seals and sweeps
- Bottom sweeps help direct water back into the enclosure.
- Magnetic or compression seals reduce spray at the strike side.
- Translucent seals maintain the frameless look while improving splash control.
Layout choices by shower shape
Frameless systems can be tailored to many bathrooms. Common arrangements include:
- Alcove: A single door between two walls, optionally with a small fixed panel to set the opening size.
- Inline: Door plus fixed panel(s) along one long side, often used with a curb.
- Corner: Two glass sides meeting at 90 degrees, anchored to two walls.
- Neo-angle: Three glass sides meeting at angles to create a compact corner entry.
- Tub-screen: A fixed or hinged glass panel on a bathtub deck to replace a curtain.
When selecting a layout, map the splash zone from the shower head, ensure door clearance from nearby fixtures, and confirm the curb or floor transitions support your plan.
Water management and ventilation
Frameless enclosures manage water with design rather than full perimeter seals. Good results come from combining several small decisions:
- Position the shower head away from the door opening when possible.
- Use a slight inward curb pitch to return water to the shower pan.
- Add transparent sweeps and seals at the threshold and strike side.
- Keep gaps intentional and uniform to balance ventilation with splash control.
Adequate bathroom ventilation is equally important. Moisture that lingers can encourage residue on glass and grout. Use an exhaust fan and allow brief door opening after use to help the space dry.
Safety and durability basics
Tempered glass is designed to be strong and, if ever compromised, to break into small granular pieces rather than sharp shards. To support safe, long-lasting performance:
- Avoid drilling or grinding the glass after fabrication—hardware holes and notches should be planned in advance.
- Protect glass edges during handling and cleaning; edges are the most vulnerable points.
- Choose hardware components that match the door’s size and weight specifications.
- Verify substrate readiness: secure studs or backing where hinges or clamps will mount.
Maintenance and cleaning
Regular, light maintenance keeps frameless glass looking clear and bright.
- Daily quick rinse: After showering, rinse glass with warm water to dilute soap and mineral residue.
- Squeegee routine: Use a squeegee from top to bottom to limit water spots.
- Mild cleaners: Choose non-abrasive, non-ammonia cleaners recommended for glass and metal finishes.
- Seal care: Wipe door sweeps and seals; replace them if they harden, discolour, or lose contact.
- Hardware check: Periodically confirm set screws and hinge fasteners are snug (without over-tightening).
If your area has hard water, a weekly wipe with a soft microfiber cloth can reduce mineral build-up. For stubborn spots, apply a cleaner approved for shower glass and rinse thoroughly.
Planning and installation checklist
Use this step-by-step list to move from idea to installed door with fewer surprises.
- Define your goals
- Prioritize openness, privacy, easy entry, or minimal maintenance.
- Decide if you prefer a swinging, sliding, or fixed-panel design.
- Assess the space
- Measure opening width/height at multiple points.
- Check walls and curb for level and plumb.
- Confirm door swing clearance and fixture locations.
- Confirm substrate and blocking
- Locate studs or solid backing for hinges/clamps.
- Evaluate tile or stone transitions at walls and curb.
- Choose glass and edges
- Select tempered glass thickness suitable for frameless use.
- Specify polished edges to enhance the seamless look.
- Select hardware
- Pick hinge type (wall, glass-to-glass, pivot) or sliding system.
- Match handle style and finish to existing fixtures.
- Plan support bars or headers for larger spans if needed.
- Plan water management
- Orient the shower head away from the opening where possible.
- Confirm curb pitch and threshold details.
- Add door sweeps and seals to reduce splash.
- Finalize layout and clearances
- Verify door swing path and handle reach.
- Check towel bars, vanities, and toilets for conflicts.
- Installation day prep
- Clear the area and protect adjacent finishes.
- Have all hardware and seals on hand and inspected.
- Post-install checks
- Confirm smooth door operation and alignment.
- Inspect seals for continuous contact.
- Test splash containment and adjust sweeps if necessary.
- Care plan
- Adopt a daily squeegee habit and monthly hardware review.
- Replace worn seals promptly.
Troubleshooting and care
Minor issues can usually be addressed with small adjustments or routine upkeep. Here are common scenarios and practical next steps:
- Water at the threshold: Verify curb pitch and ensure the bottom sweep fully contacts the threshold. Replace worn sweeps.
- Door rubs or misaligns: Check hinge screws for snugness and ensure the door opens without contacting nearby fixtures.
- Persistent spotting: Use a non-abrasive glass cleaner and squeegee regularly; consider more frequent wipe-downs where mineral content is high.
- Noisy sliding panel: Inspect roller tracks for debris; clean and ensure any guides are properly seated and free of obstructions.
- Loose handle: Tighten set screws carefully to avoid overtightening against the glass.
If an issue persists or involves glass damage, stop using the door and consult a qualified glass professional for evaluation and repair options.
Style and privacy ideas
Frameless doors complement many design directions. Use finishing touches to align the enclosure with your overall bathroom scheme:
- Finish coordination: Choose hardware finishes that echo your faucet, shower head, or cabinet pulls for a unified look.
- Glass clarity: Clear glass shows off tile patterns and room depth; patterned or frosted glass can add privacy while preserving light flow.
- Minimalist lines: Fixed walk-in panels maximize openness in contemporary baths.
- Classic layouts: Hinged doors with a simple pull work well across traditional and transitional styles.
FAQ
Do frameless shower doors leak?
Frameless designs rely on precise alignment, curb pitch, and clear seals to control splashes. Small, intentional gaps remain around the door edges for movement and ventilation. Proper layout, sweeps, and seal placement help keep water inside the shower area during normal use.
How do I choose between a swinging and a sliding frameless door?
Select based on clearance and convenience. A swinging door needs room to open without hitting nearby fixtures, while a sliding system stays within the footprint and can be ideal for compact bathrooms. Also consider maintenance preferences and the location of the shower head relative to the entry.
What routine maintenance keeps the glass clear?
Rinse after use, squeegee from top to bottom, and clean weekly with a non-abrasive glass cleaner. Wipe seals and check hardware periodically. Replacing worn sweeps and keeping tracks or guides free of debris preserves smooth operation and clarity.


